
NocoBase Commercial License Activation Guide
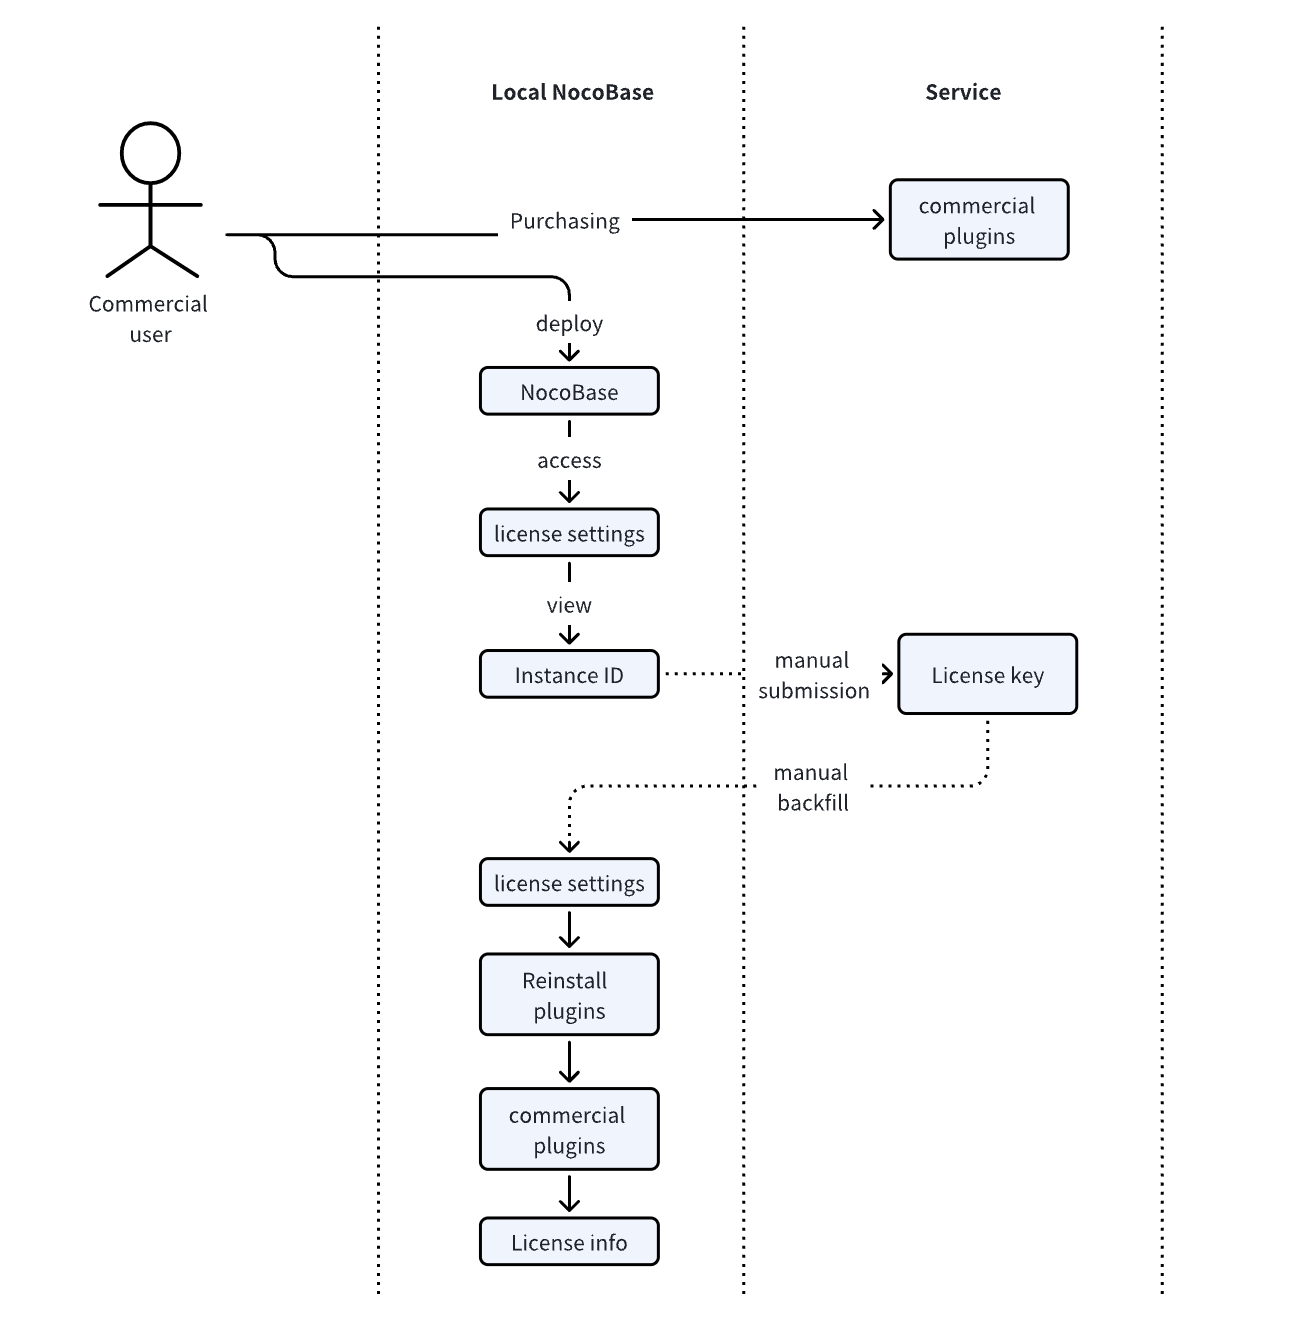
To enhance user experience and strengthen security, we have comprehensively upgraded our commercial licensing and activation process. The new authorization method replaces the previous approach of entering usernames and passwords in configuration files, introducing a mechanism based on “Instance ID” and “License Key”.
The core advantages of the new solution include:
- Enhanced Security: No longer requires storing your account information in plain text, reducing the risk of sensitive information leakage.
- Simplified Process: Authorization is directly bound to your NocoBase instance, making license management and updates more intuitive and convenient.
- Increased Flexibility: When your deployment environment changes, you can easily regenerate authorization to quickly adapt to the new environment.
- License Protection: Through backend license management and status monitoring, you can monitor the actual usage of your license, promptly detect and handle unauthorized applications, and prevent commercial license misuse.
This guide will walk you through the complete new NocoBase commercial license activation process.
License Activation Step-by-Step Guide
Before starting, please ensure you have successfully installed and are running NocoBase Community Edition.
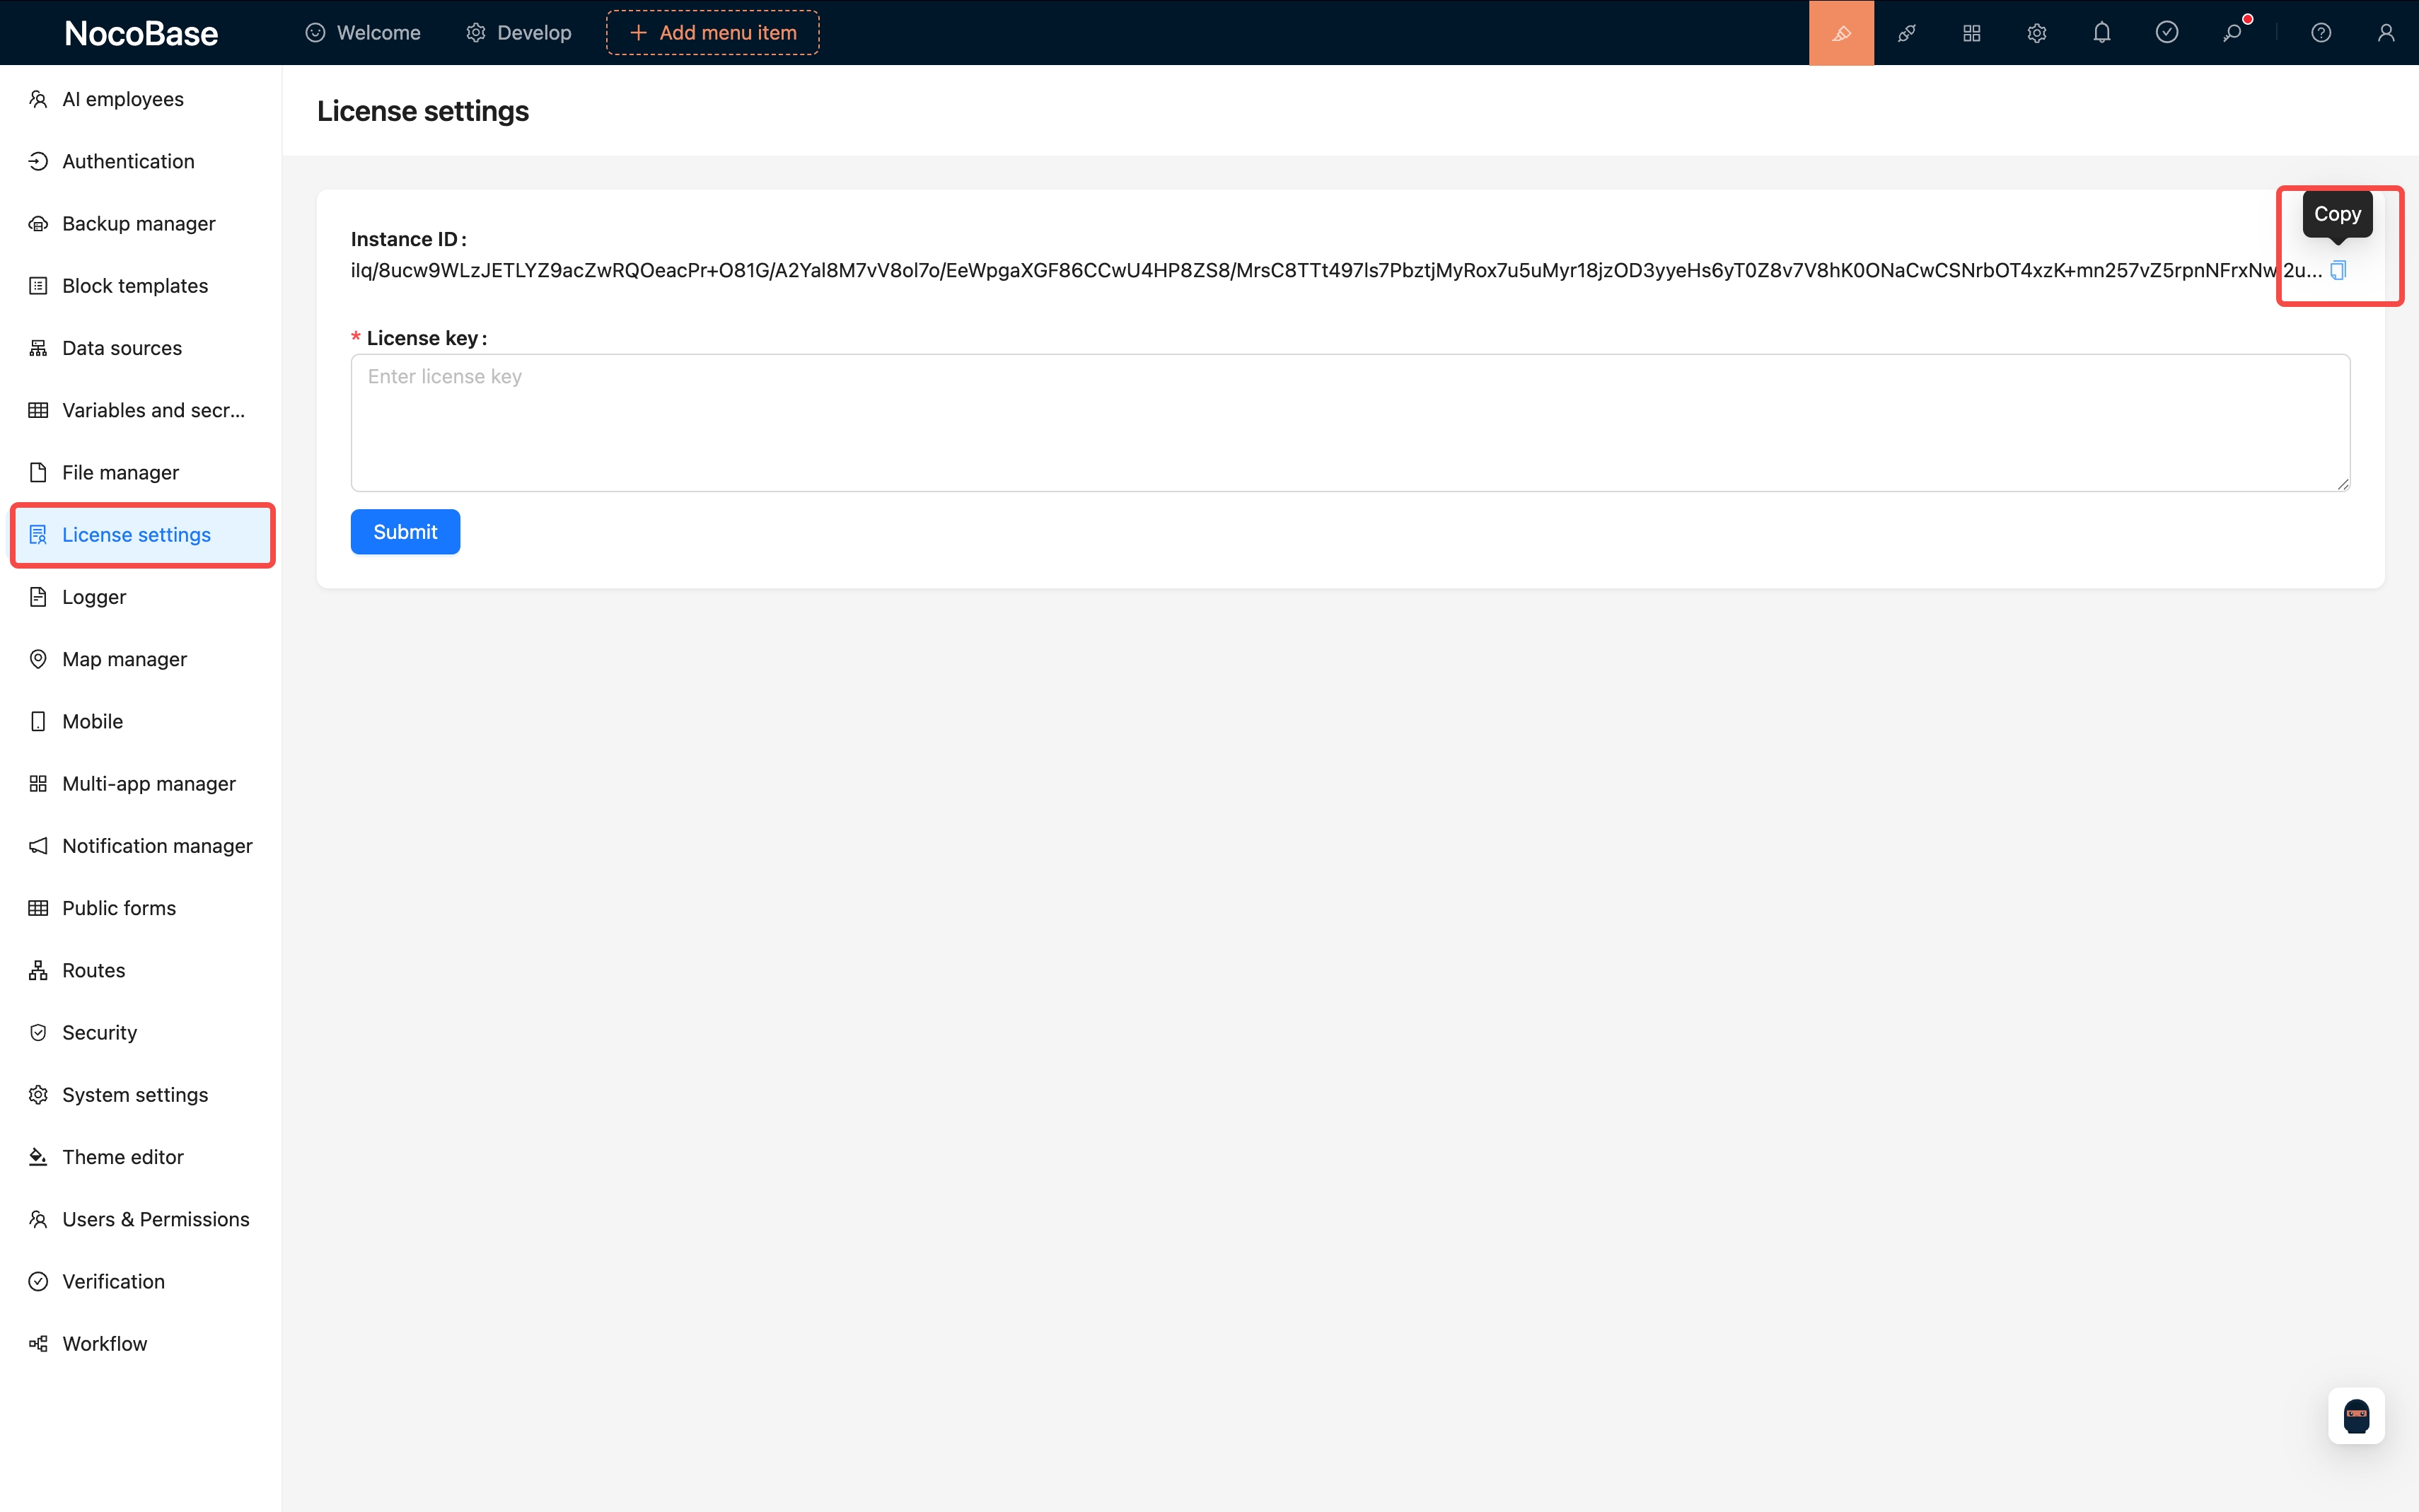
Step 1: Access License Page and Copy Instance ID
- In your local NocoBase application, navigate to
System Settings->License Settingspage. - On this page, you will see an Instance ID string, which is the unique identifier for your current running environment. Click the copy icon to its right.
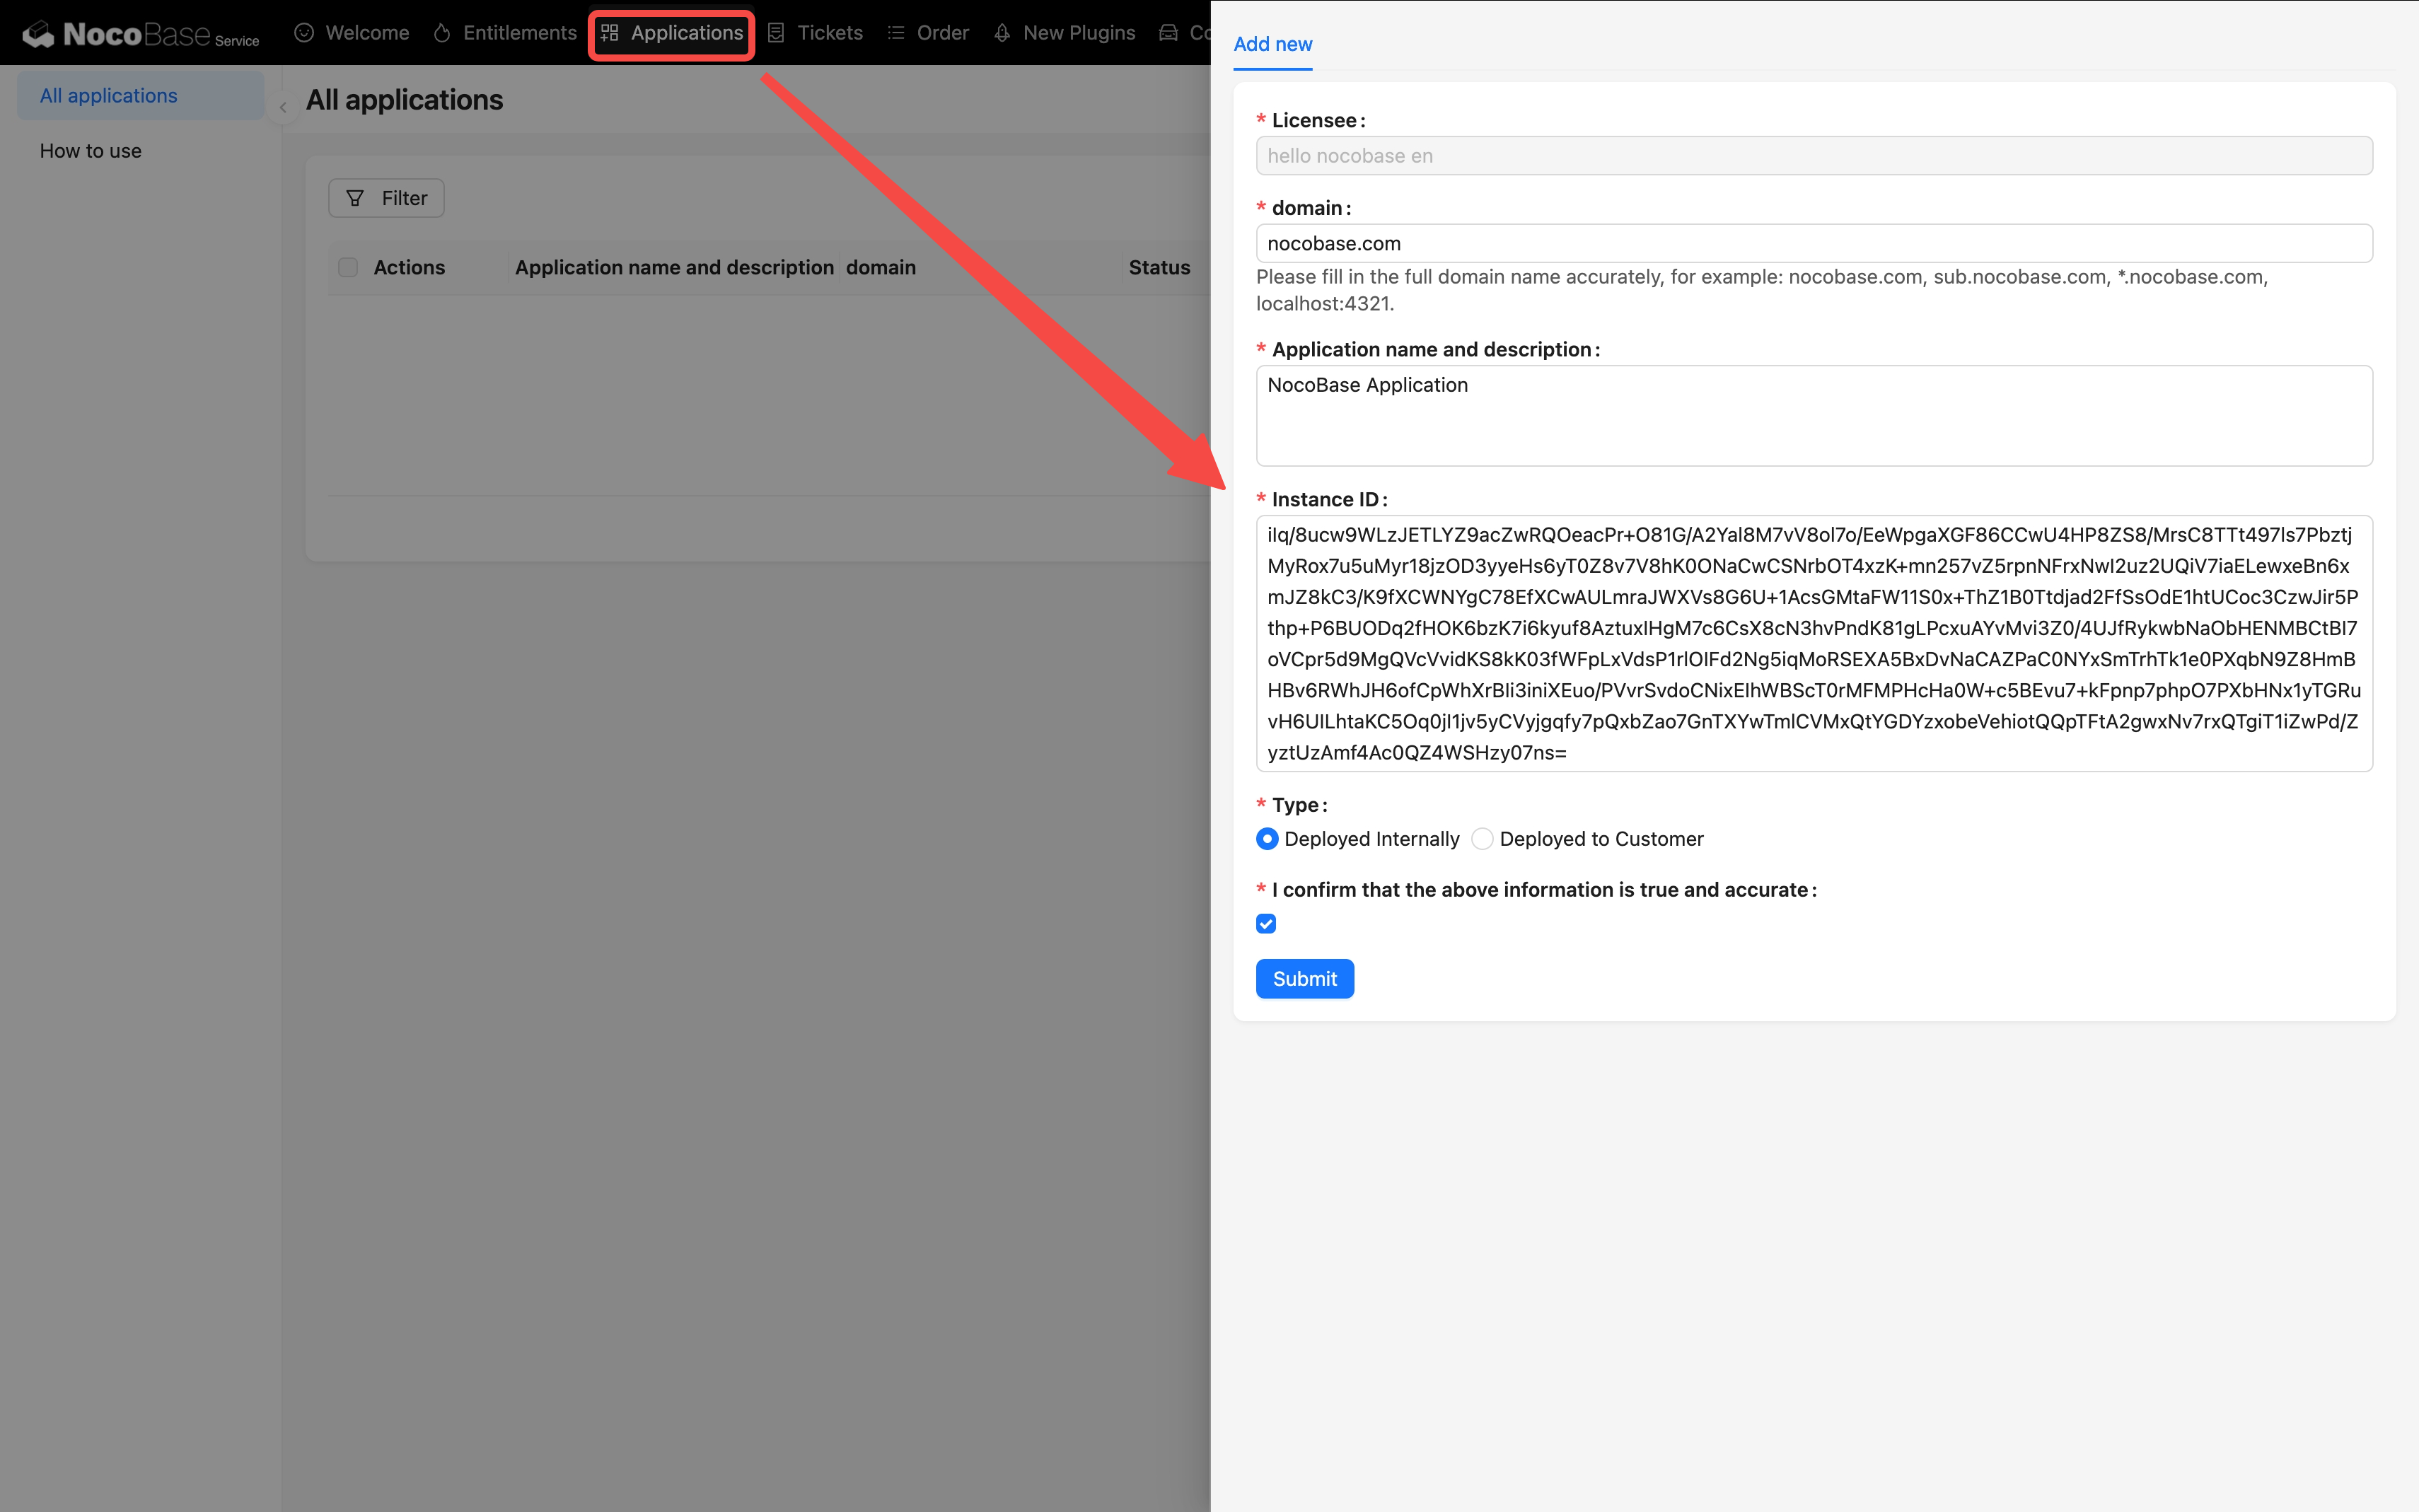
Step 2: Create Application on Service Platform and Associate Instance ID
- Log in to the NocoBase Service platform, click the “Add” button on the “Applications” management page.
- In the popup form, fill in your application information and paste the
Instance IDcopied from the previous step into theInstance IDinput field, then submit.
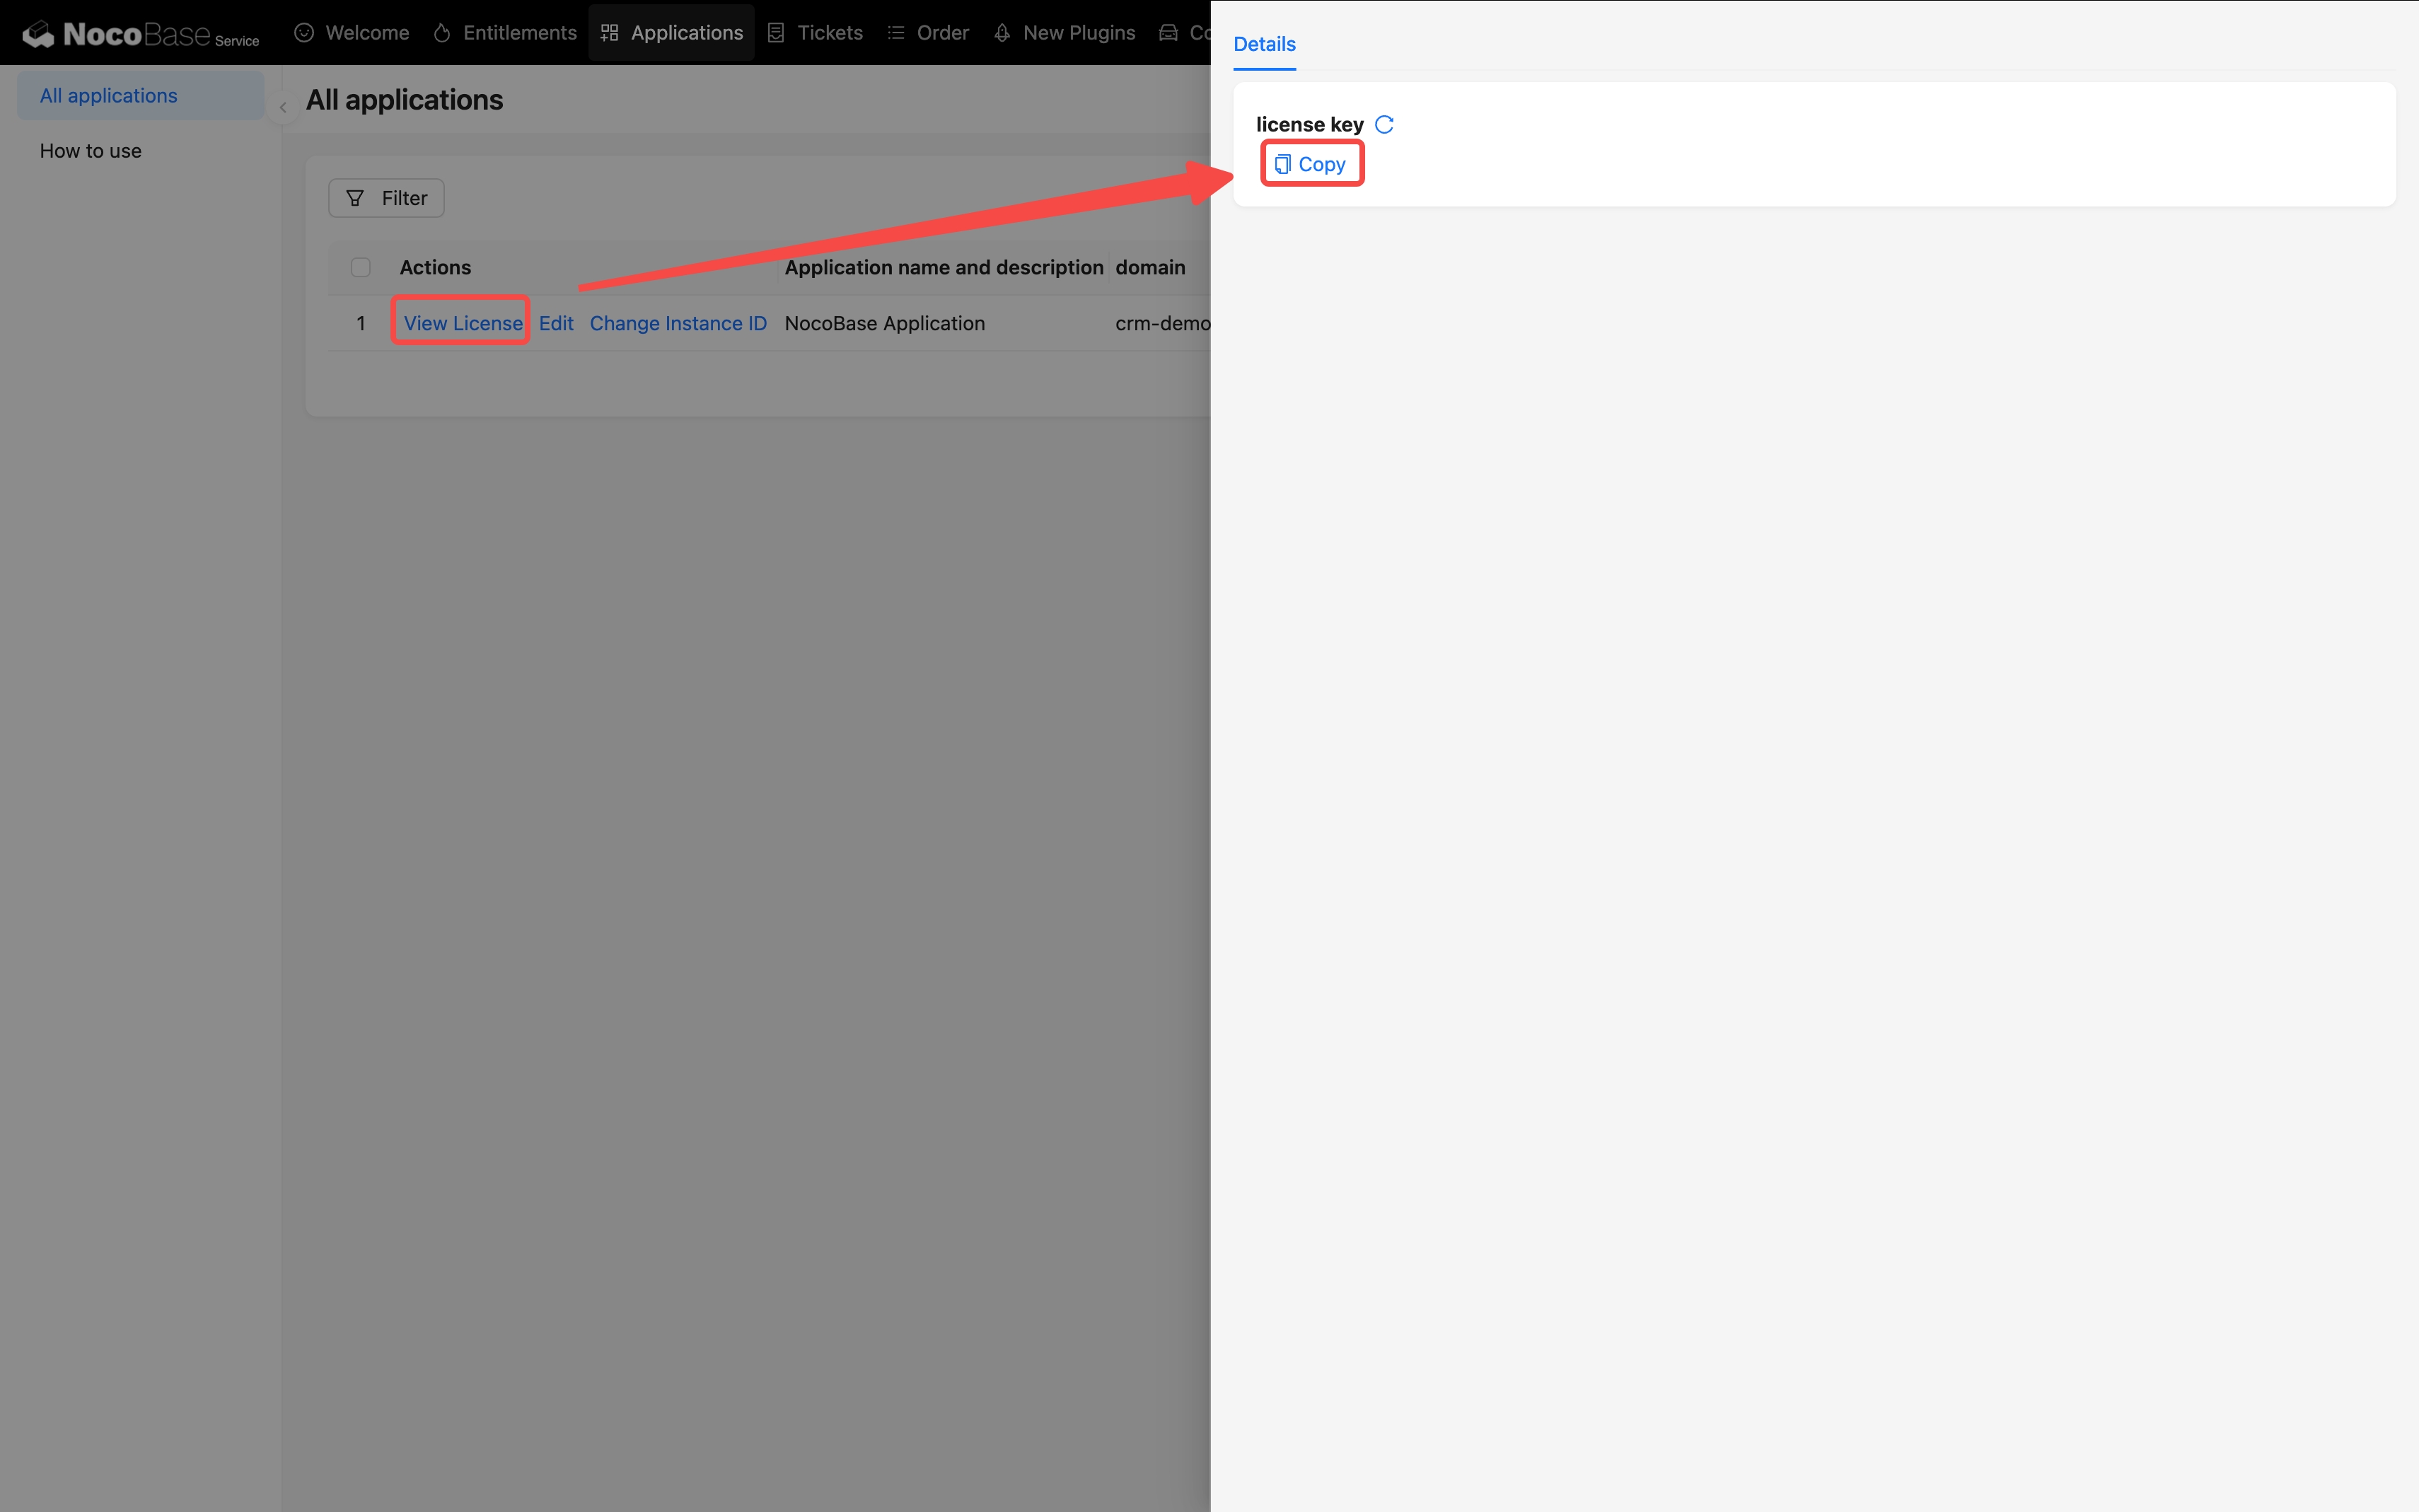
Step 3: Obtain License Key
- After the application is successfully created, return to the license list, find the corresponding entry, and click the “View License” button in the action column.
- In the license details popup, click the “Copy” button to obtain the License Key that matches your instance.
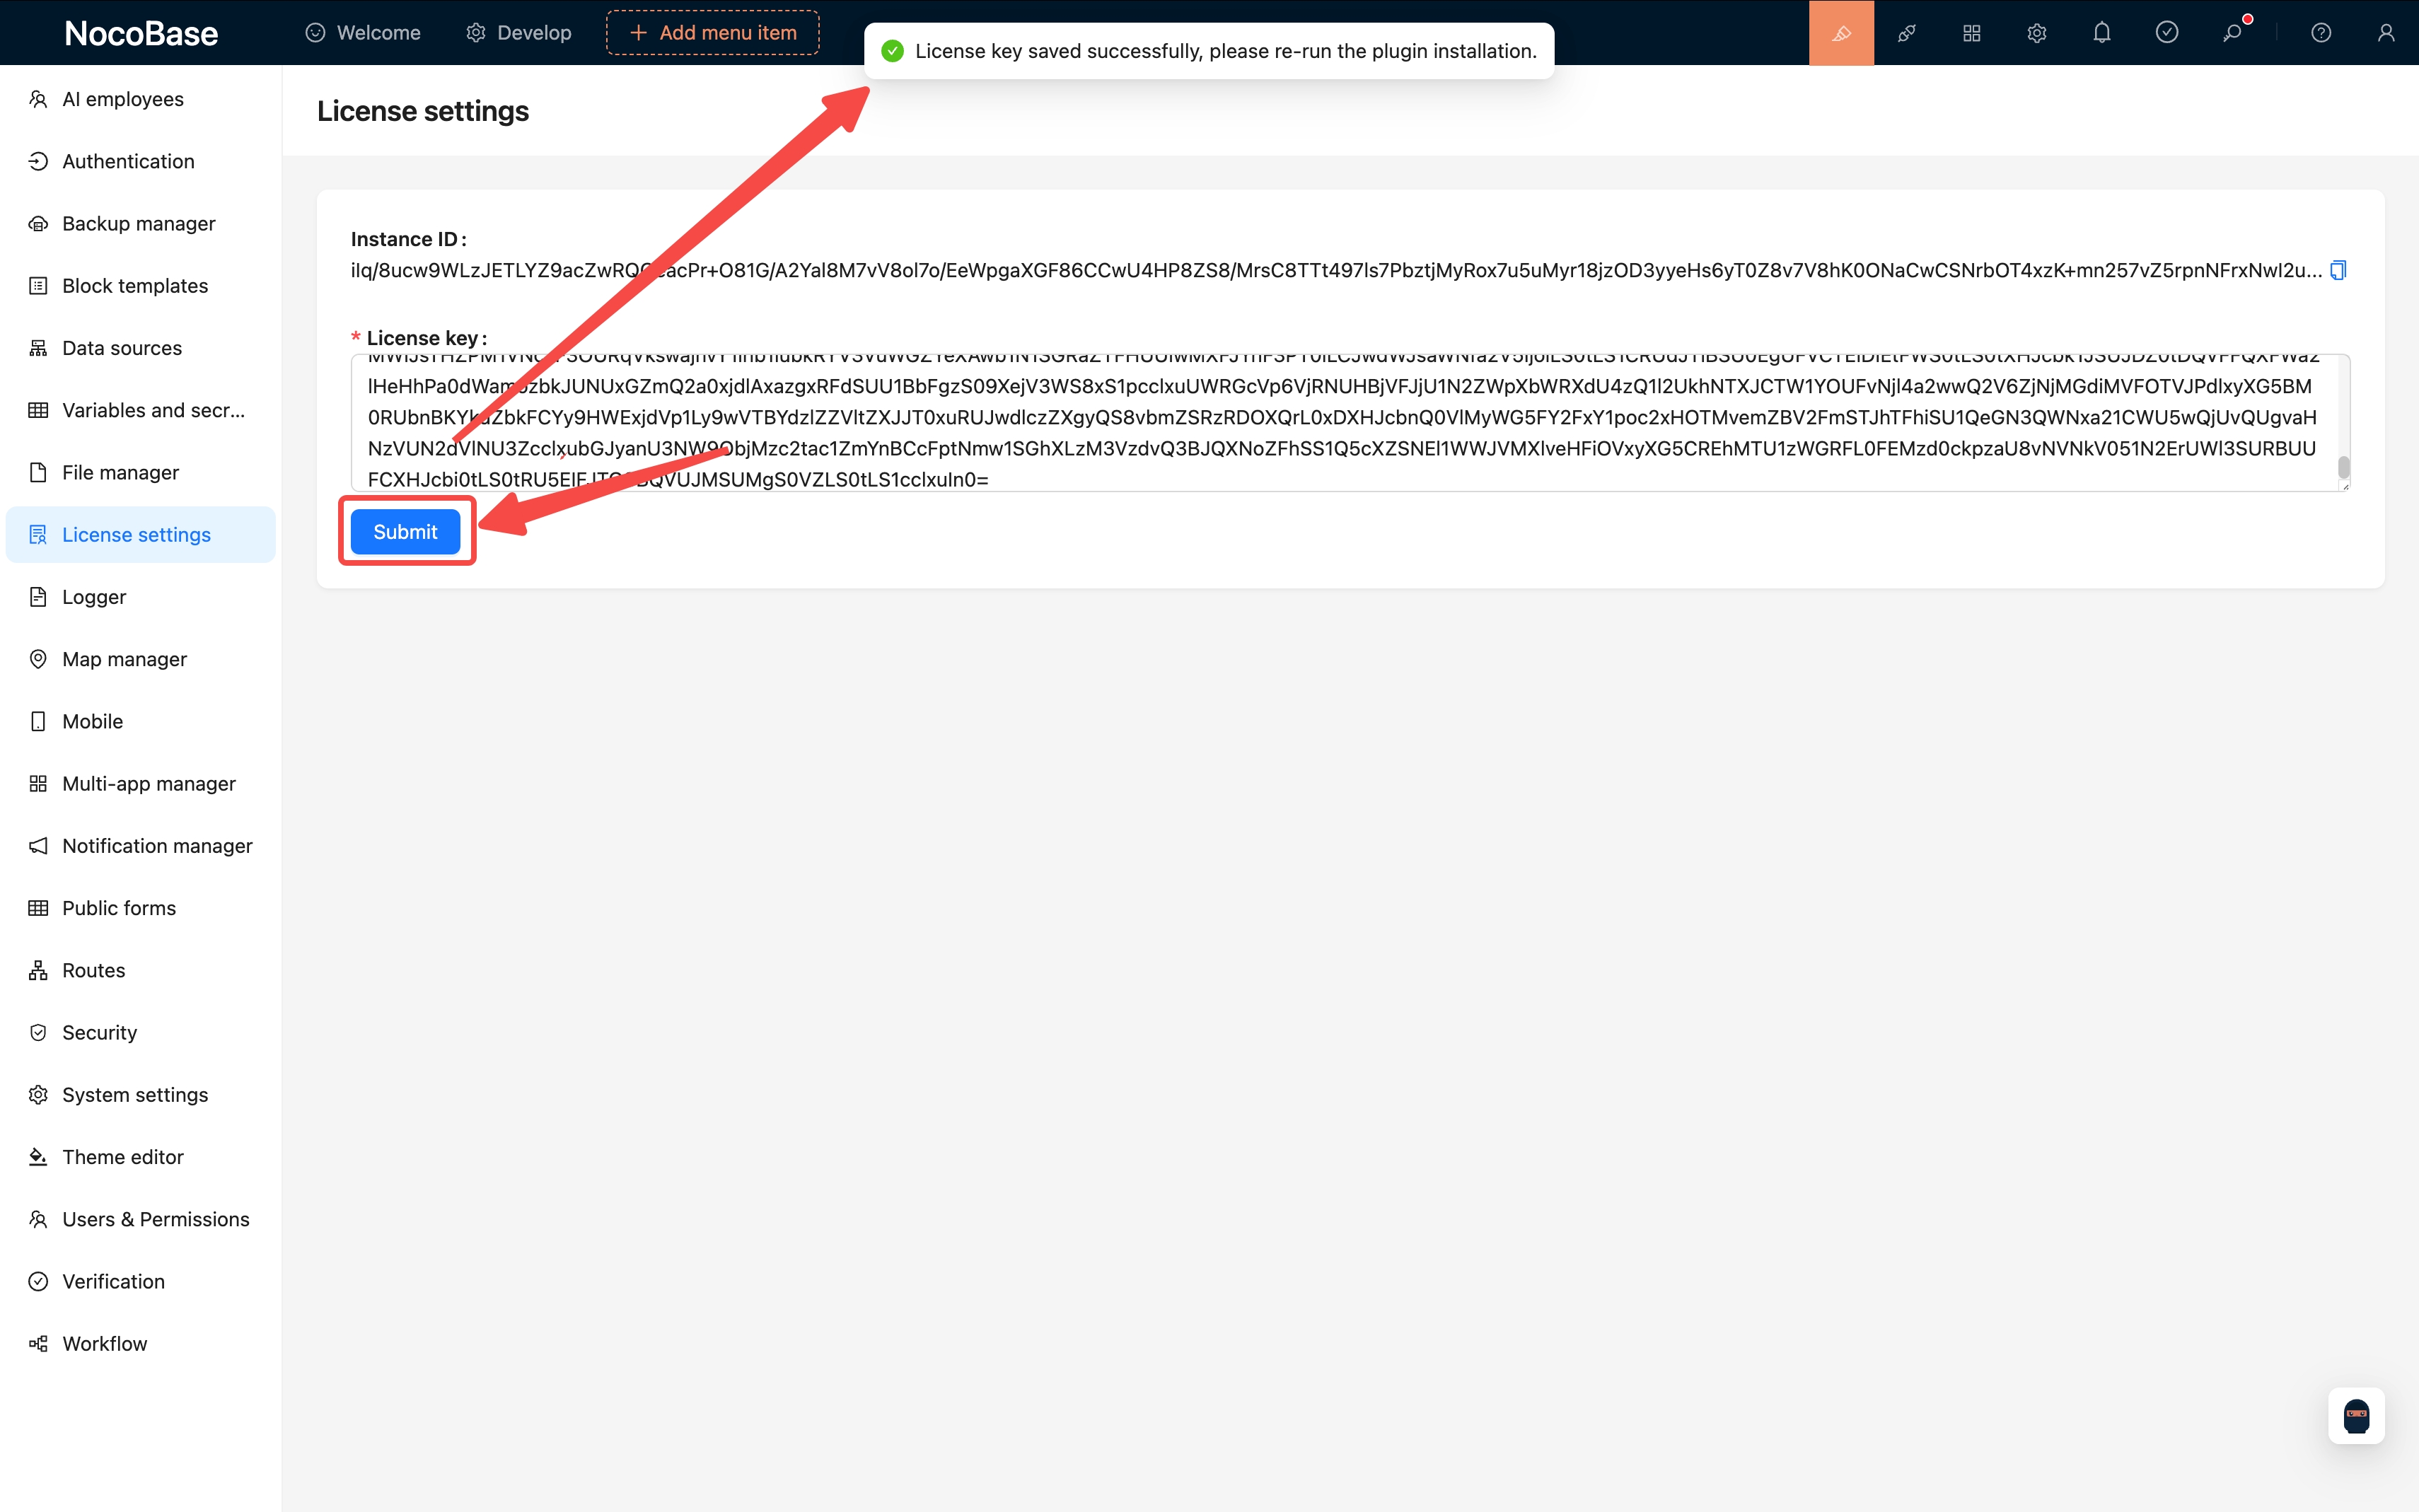
Step 4: Configure License Key in NocoBase
- Return to your local NocoBase
License Settingspage. - Paste the just-copied
License Keyinto theLicense keyinput field and click the “Submit” button. - After successful saving, the system will display “License key saved successfully, please restart the server”, indicating that the license key has been configured successfully and is awaiting restart.
Step 5: Complete Activation and Download Commercial Version and Commercial Plugins
Restart your NocoBase service to apply the license and automatically download the commercial version and commercial plugins.
- For Docker deployment: Execute the restart command
docker compose restart app. - For source code or
create-nocobase-appdeployment: Execute theyarn nocobase pkg download-procommand in the project root directory.
After the service restarts and successfully downloads plugins, your commercial license is activated. If you need to change the license, you can re-enter the license settings page, click the “Change key” button, and repeat the above process.
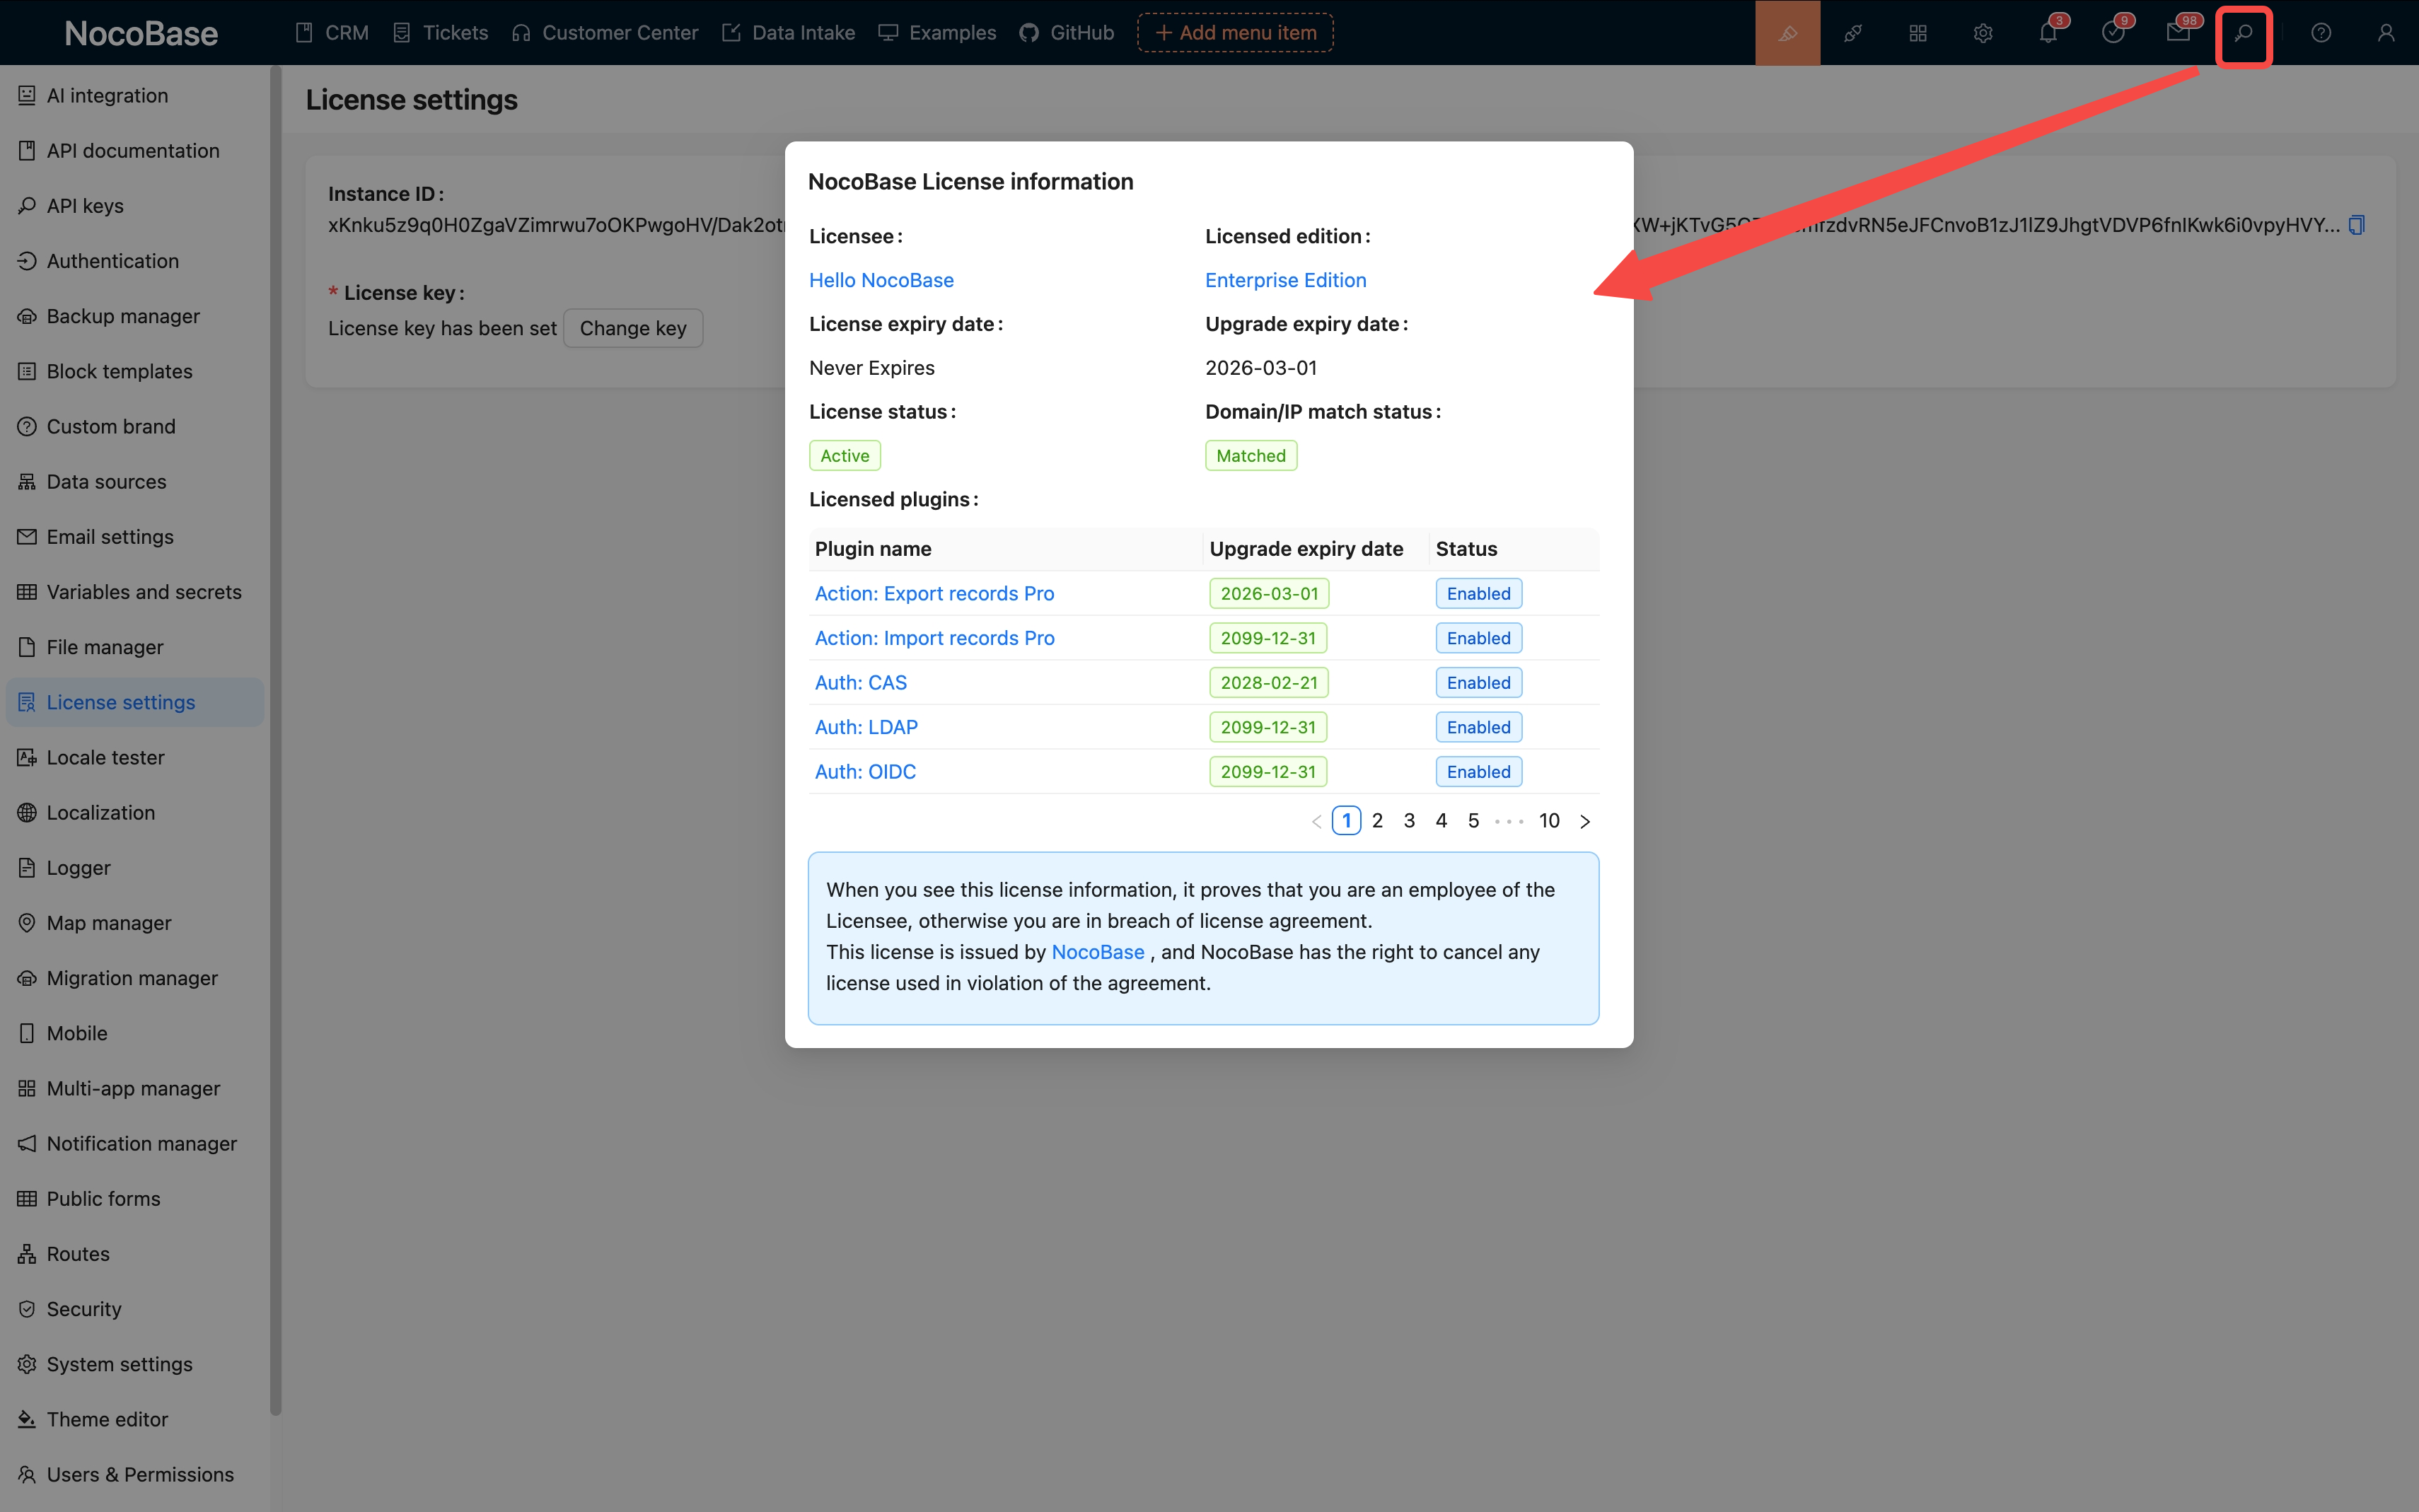
How to View License Information
After license activation, you can click the license information icon in the upper right corner of the NocoBase interface at any time to view detailed status of the current license, including license version, expiration date, domain matching status, and authorized plugin list.
Deployment and License Quick Checklist
When encountering issues, you can refer to this checklist for quick troubleshooting:
- Step 1: Get Instance ID
- NocoBase Community Edition/Unlicensed Edition is running successfully.
-
Instance IDhas been completely copied from theLicense settingspage.
- Step 2: Generate License Key
- Application has been created on the Service platform.
- The
Instance IDpasted when creating the application is the latest and correct one. -
License Keyhas been completely copied from “View License”.
- Step 3: Activation
-
License Keyhas been pasted back into NocoBase and saved successfully. - Container restart or
download-procommand has been executed according to deployment method. (Many users miss this step!)
-
- Verification
- License information popup shows status as “Active”.
Frequently Asked Questions (FAQ)
During installation or use, you may encounter the following prompts. Please follow the corresponding solutions:
1. License key mismatch - License Key Does Not Match Environment
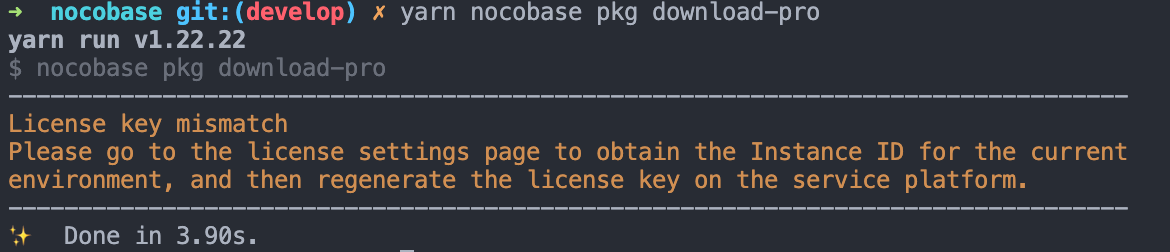
[Q]Why do I get License key mismatch after configuration?
[A]Your running environment may have changed, causing the “Instance ID” to update, but your application still has the old “License Key”.
Solution: Please strictly follow Step 1 of this guide to get the latest Instance ID from your current environment, then complete the subsequent process to generate a new “key”.
2. Invalid license key - License Key Has Expired
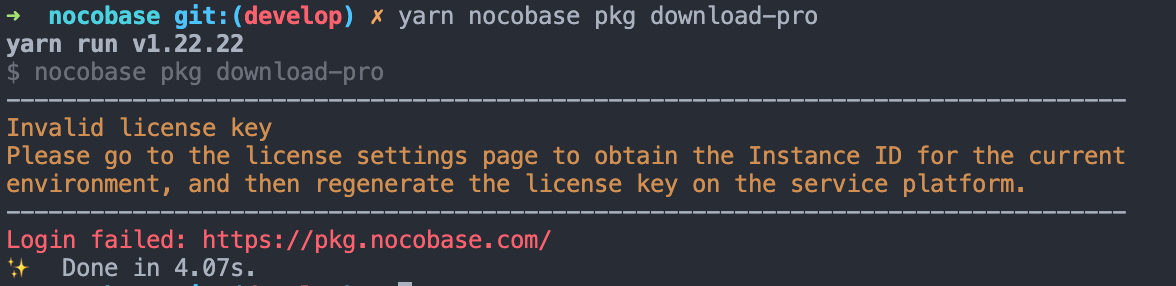
[Q]What does Invalid license key mean?
[A]Your License Key may have expired or been marked as invalid by the platform for other reasons.
Solution: Please contact us or check your license status on the service platform. If needed, regenerate the License Key and configure it.
3. Invalid license key format - License Key Format Error

[Q]What should I do about Invalid license key format?
[A]The License Key you pasted is incomplete or has incorrect format, preventing the system from parsing it.
Solution: Please return to the service platform, ensure you have completely copied the License Key, then re-paste and save.
4. License Information Dialog Forcibly Appears When Accessing System
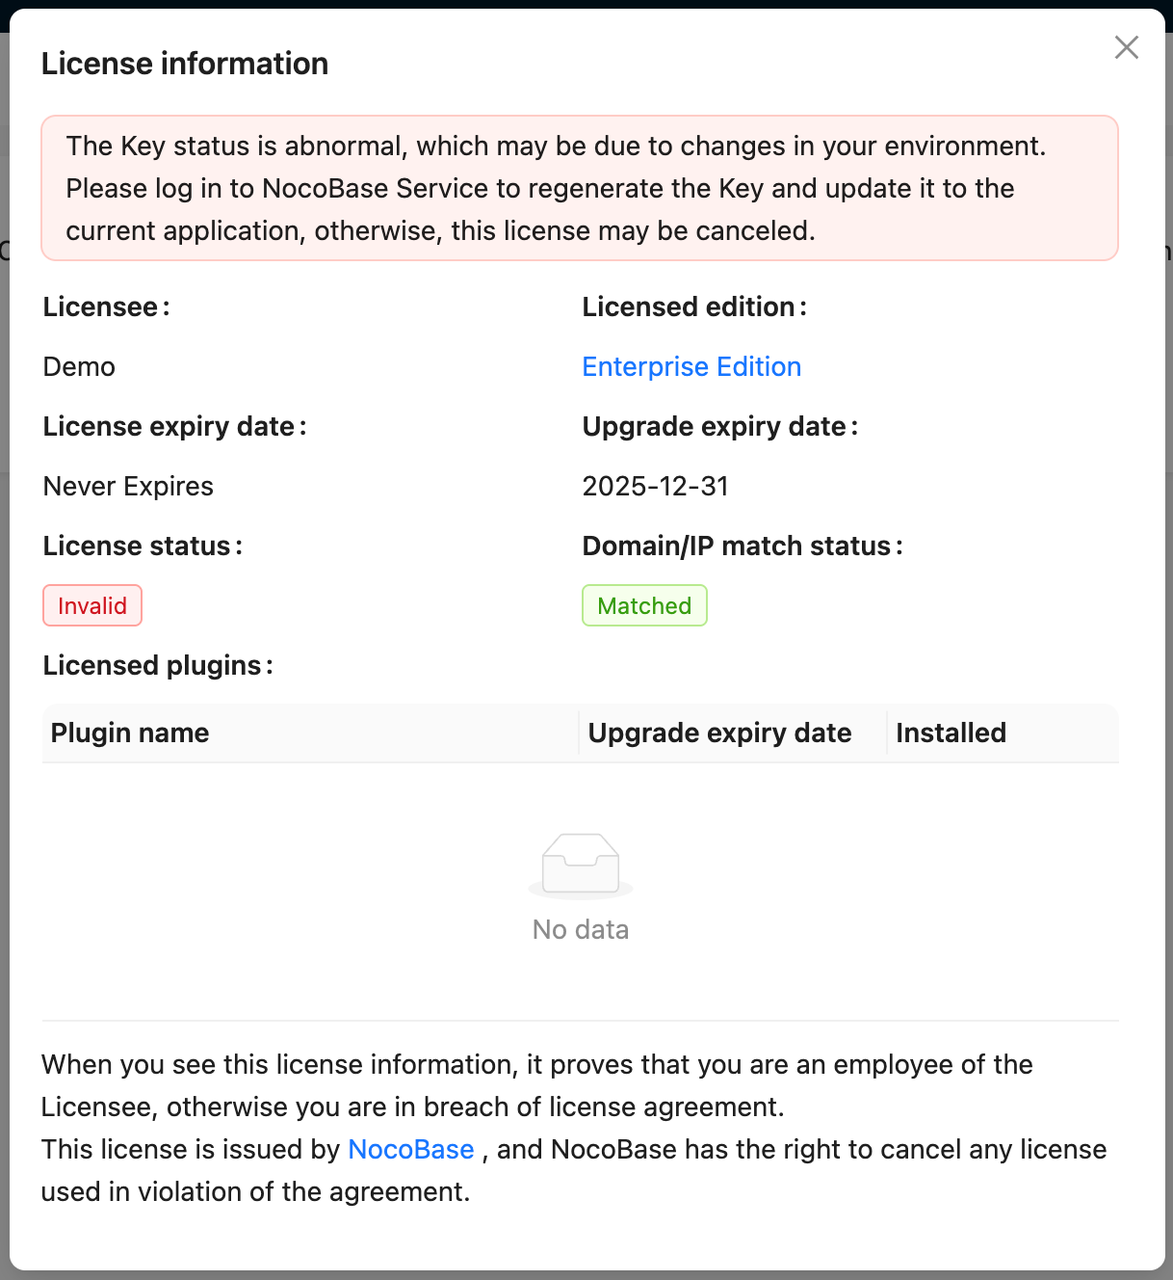
[Q]Why does the license information dialog always appear?
[A]This popup usually indicates license verification failure. Possible reasons include:
License Keyis corrupted or doesn’t match the local environment- License has expired or is invalid
License Keydoesn’t match the version of commercial plugins you’re running
Solution: The most direct solution is to completely re-execute the license configuration process: get the latest Instance ID, generate a new License Key, and set it in the local system.
5. Environment Migration Related Issues
[Q]I migrated my server/database, and commercial plugins stopped working. What should I do?
[A]This is the same issue as above. The server or database is key information that constitutes the “ID card (Instance ID)”, and when they change, the Instance ID changes.
Solution: Same as above, get the new Instance ID, generate a new License Key, and reactivate. The entire process is like updating your ID address after moving.
6. Plugin Not Taking Effect
[Q]I’ve restarted, why are commercial plugins still not working?
[A]If you’ve confirmed the License Key configuration is correct, try the following troubleshooting:
- Check Network: Ensure your server can access NocoBase’s npm repository.
- Check Logs: Review NocoBase startup logs for plugin download failures or license verification errors.
- Manual Execution: If you’re using source deployment, manually execute the
yarn nocobase pkg download-procommand again and observe the command line output.
7. Commercial plugins not showing up after activating on a running system?
[Q] I started the NocoBase system first and then entered the License Key in the settings. The activation was successful, so why aren’t the commercial plugins appearing?
[A] This is expected behavior and a very common question. NocoBase is designed to check the license and load the corresponding plugins at service startup. If you completed the activation while the system was already running, you need to restart the NocoBase service to trigger the download and activation of the commercial plugins.
Simply put, the license is like a “pass” for NocoBase, but it needs to “re-enter the door” (restart) to check and use this pass.
Please perform the restart operation according to your deployment method:
- For Docker deployment: Execute the restart command
docker compose restart app. - For source code or
create-nocobase-appdeployment: First, stop the running service in your terminal (usually by pressingCtrl+C), and then run the start command again, such asyarn start.
8. Comparison Between New and Old Authorization Methods
[Q]How is this process different from the previous username/password method?
[A]The old method exposed your account password directly in the environment, which wasn’t secure enough. The new License Key system has several benefits:
- More Secure: You don’t need to expose your main account password, only use keys bound to specific environments.
- More Flexible: You can generate different
License Keysfor different clients or projects, making management easier. - Clearer: License information is clear at a glance, with all details recorded on the Service platform.